Testing Equipments
Spectroscopic Characteristics Detection
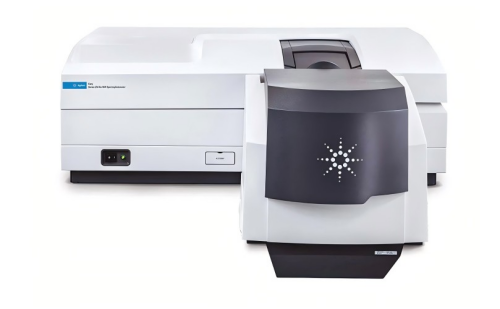
Filter Spectral Characteristics Measurement
Brand: Aglient
Model: Cary 7000
Function: Maximum scanning speed: 2000 nm/min for UV-visible light, 8000 nm/min for near infrared. Photometric system: Double beam. Measurement types: transmission, reflection, multi-angle measurement, integrating sphere measurement, etc., with a test wavelength of 175 - 3300 nm.
A spectrophotometer is a device that measures the transmittance and reflectance characteristics of a filter. Agilent's Cary7000 is its most advanced spectrophotometer.
For the 3D sensing market, it can measure the transmittance and reflectance curves at multiple angles of incidence.
For medical and instrument filters, it can measure the cutoff depth up to OD6/8/10.
High Reflectivity Detection

Reflectivity Meter
Brand: GLACIER
Model: CRD-1030
Function: Reflectivity measurement up to 99.9995% reflectivity
Different incident angles: 5° - 45° (and 0°)
S and p polarization (measured separately) Anti-reflection coating characterization: reflectivity as low as 0.0005% (5 ppm) Simple and
repeatable alignment of 0.5", 1" and 2" optics, spring-loaded mirror fixture for repeatable mounting without stress
Usable wavelength range: 375 - 1550 nm
Many optical lenses have high reflectivity requirements, but the spectrophotometer is not accurate for high reflectivity samples. CRD high reflectivity measuring instrument can be used to perform high-precision reflectivity measurement at 1030nm. CRD uses the cavity ring-down method to measure reflectivity. When a pulsed laser is incident into the cavity along the optical axis, diffraction and scattering losses are ignored. The monochromatic pulse light oscillates back and forth between the two cavity mirrors, and part of the light is transmitted after each cycle. The detector receives the light pulse signal and obtains its attenuation in the form of a single exponential. Through the accumulation of process technology, the high-reflectivity film is measured by CRD, and the reflectivity is>0.999670.
Films weak Absorption and Temperature Rise Detection
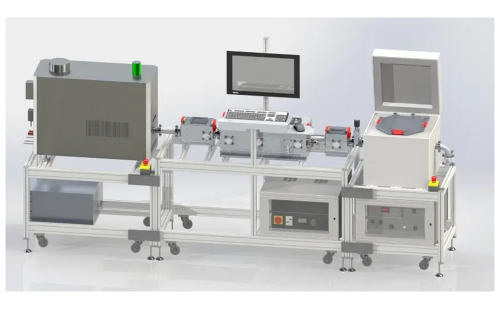
Thin Film Weak Absorption and Temperature Rise
Relative Weak Absorption Tester
Brand: LZH
Model: PCI-TR
Function: It can be tested with conventional wavelength (1064nm) or customized wavelength, and can test square or circular samples with sample size of 3×3×3~50×50×50 (mm);
Sensitivity: Volume absorption: 1ppm/cm; Surface absorption: 1ppm (one measurement can be distinguished);
Test speed: conventional 2min/piece (relative to 6mm thickness)
By measuring the absorption and temperature rise data of the film, it can be judged how much the film is affected by the laser of a specific wavelength.
Absorption is measured by a relative weak absorption tester (PCI-TR), and the film layer on the surface of the lens is processed by a 1064nm (or 1030nm) pump light, and the thermal lens effect formed by the film layer is detected by a 632nm detection light. The relative weak absorption value of the film is calculated by processing the detection data. Through long-term technical accumulation, the absorption value of the anti-reflection film can be <3ppm, and the absorption of the multilayer film (layer>30) can be <5ppm.
Temperature rise measurement is a measurement method that characterizes the temperature change after film absorption, which is more in line with actual application scenarios. The measurement uses a 1070nm laser, the test power is 9kW, the average power density acting on the lens is 46kW/cm2, the lens film to be measured is processed for 60s, and the temperature of the laser action area is measured using an infrared camera. The temperature rise data is obtained by subtracting the initial temperature of the lens from the highest temperature. Through long-term technical accumulation, the film temperature rise value can be less than 5℃.
High-precision Surface Detection
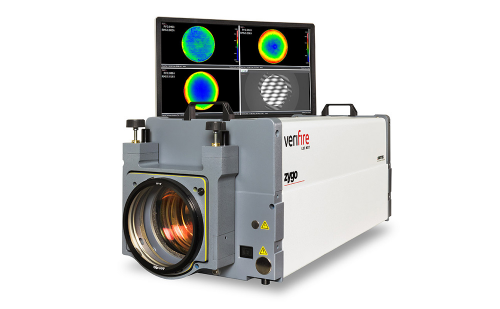
High-precision Surface Measurement
Interferometer
Brand: ZYGO
Model: Verifire MST
Function: Mainly used for precise measurement of various plane and spherical reflective surfaces and surface shapes of optical systems, transmission wavefront of optical systems, wedge angle test of prisms, etc., and material uniformity test and analysis. Using helium-neon laser (633nm), Fizeau phase shifting method, online measurement of the measurement beam diameter is 52mm (6"). The standard mirror accuracy is 1/20 wavelength, CCD resolution can reach 1000*1000, RMS simple repeatability <0.06nm.
Surface shape is a very important parameter of optical lenses. By using Zygo MST 12 interferometer, the surface shape of lenses of various sizes can be measured, which can be used to analyze the characteristics of thin film surface shape, lens surface shape change before and after coating, etc. By rationally utilizing materials and processes, the surface shape change before and after coating can be small, ensuring the surface shape requirements of optical components.
High-precision Quality Detection
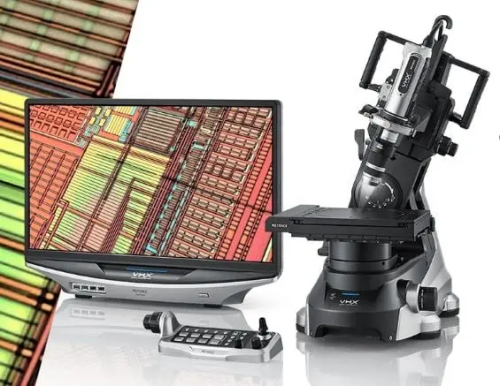
Surface Quality Measurement
Digital Microscope System
Brand: Keyence
Model: VHX-7000
Function: Achieves a depth of field equivalent to more than 20 times that of an optical microscope. The lens, camera, and imaging software are all designed by Keyence to achieve observation under a balance between depth of field and brightness. Observation can be performed easily and intuitively. Plane measurement and 3D measurement can be performed. In addition, roughness measurement, cleanliness measurement, crystal grain size measurement, etc. can also be completed with just this one device.
The surface quality of the lens film is a crucial parameter. Relying solely on manual judgment of the surface quality may result in misjudgment and omission. With VHX-7000, impurity points can be accurately measured, and microscopic magnification can help with defect analysis of unknown abnormal areas. At the same time, VHX-7000 also has the function of image stitching after full-surface shooting, and can perform cleanliness analysis on the entire stitched picture, effectively providing the number of impurity points of different sizes, which is convenient for controlling the surface quality of the film.
High-precision Contour Measurement
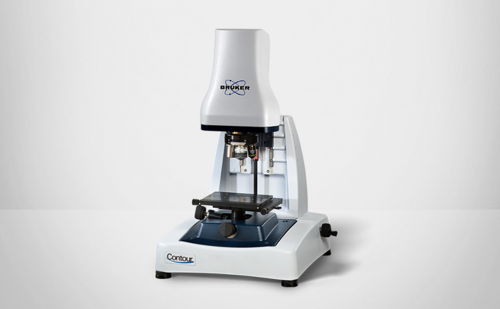
High-precision Contour Measurement
Contour Meter
Brand: BRUKER
Model: Contour GTK
Function: Use non-contact surface measurement technology to measure surface roughness, providing vertical range measurement from angstrom to millimeter in a large field of view; vertical resolution is better than 0.01nm, Z-direction scanning range is 0.1nm to 10mm, RMS repeatability is 0.01nm.
CATEGORIES
LATEST NEWS
CONTACT US
Contact: Jessie
Phone: +86 13772020541
E-mail: info@borisun.com; jessie@borisun.com
Whatsapp:+86 13772020541
Add: First floor, dalanyingthermal insulation material factory, Shima Road, Hantai District, Hanzhong City, Shaanxi Province, China 723000
